Using Zoom with Moodle
TCM has transitioned from Zoom to Microsoft Teams, as part of the general transition to Microsoft services. Teams should be exclusively used for scheduling and participating in all online meetings.
Using Teams with Moodle
You can easily add a Teams meeting to Moodle, using your course activity chooser. You can follow this step-by-step guide to add a meeting to your course.
Step 1: Turn on editing for your course

Step 2: Click “Add an activity or resource”
Go to the Moodle section where you want to add a Teams meeting and click “Add an activity or resource”, located at the bottom of each section.

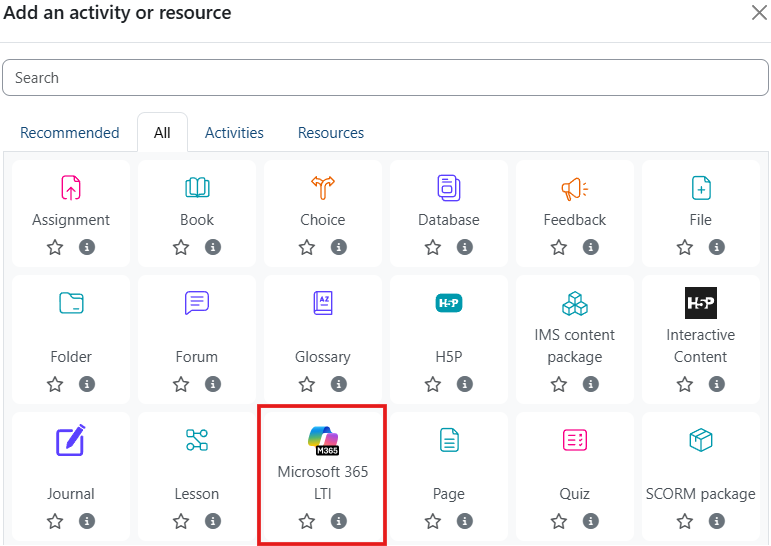
Step 3: Click “Microsoft 365 LTI” in the Activity Chooser
Click on the “All” tab at the top of the Activity Chooser and then “Microsoft 365 LTI” button.
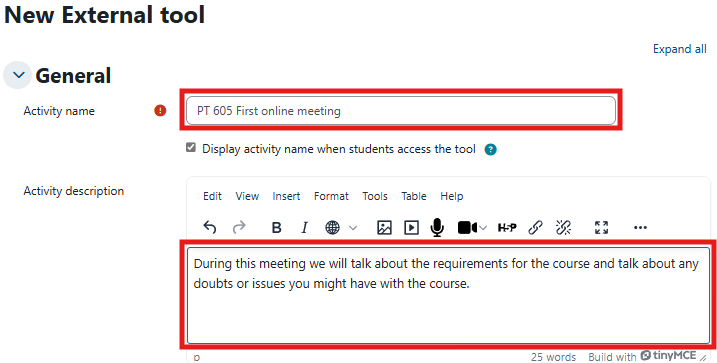
Step 4: Give your meeting a meaningful title and description
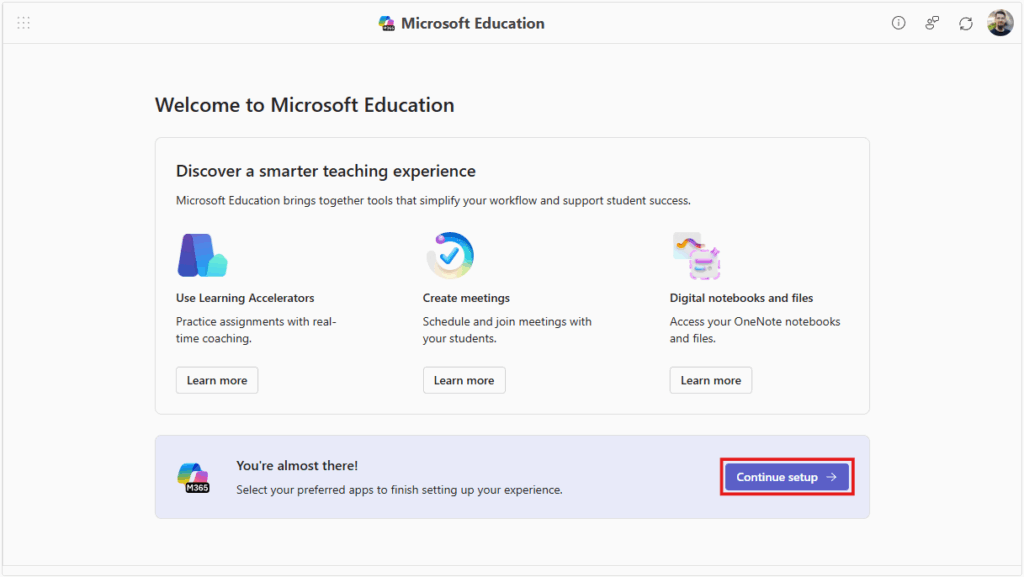
Step 5: Save the activity and finish the setup
Click “Save and display” to save the activity. When you do this, you will see the following screen. Click “Continue setup” and “Done” on the next screen.
On the next screen, make sure that Teams Meetings is enabled while Teams are disabled.

After clicking “Done”, you will need to wait a moment for the setup to be finished.
Step 6: Create the meeting
Click the “Teams Meeting”


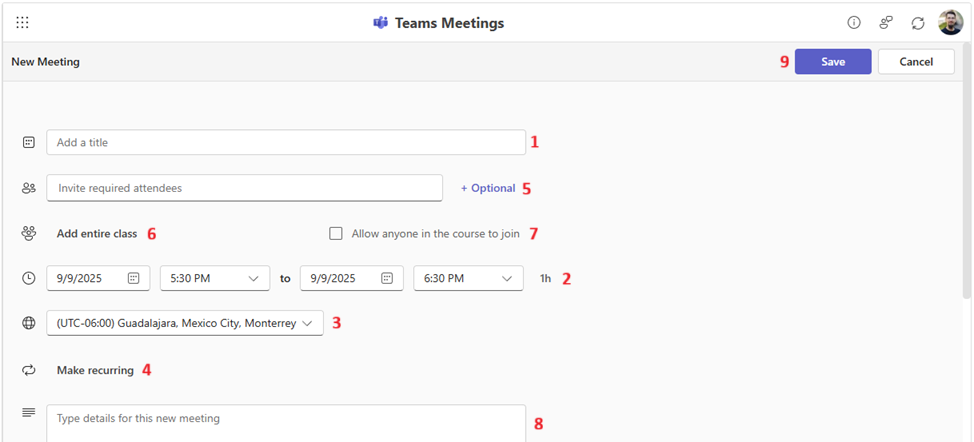
Step 7: Fill out the details and invite students
You need to add a title for the meeting (1), as well as chose dates and times (2). Remember to set up the proper time zone (Teams will show the time to everyone in their own time zone) (3). If you plan to have meetings regularly (e.g. every day for a week), you can make one recurring meeting instead of multiple separate meetings (4).
Add students by name or email (5). Remember that only the chosen students will be able to join and only using their @tcmi.edu accounts. You can add all the students with one click (6) or make the meeting open for everyone who is part of the course (7).
You can add a description to the meeting if you want (8).
Remember to click save when you finish (9)!